Budget-Friendly 10g pfSense Build with HP t740 for Effortless Networking

Table of Contents
10 Gigabit Capable pfSense Build on a Budget with HP t740
In today’s digital age, having a robust and secure network is essential for both individuals and businesses. pfSense, a powerful open-source firewall and router software, offers a cost-effective solution for achieving high-performance networking. If you’re looking to build a 10g capable pfSense router on a budget, the HP t740 Thin Client is an excellent hardware choice. In this guide, we will walk you through the steps to create a powerful pfSense router using the HP t740, providing you with the speed and security you need without breaking the bank.
Why Choose pfSense and HP t740?
pfSense: A Reliable Choice for Network Security
pfSense is a well-established open-source firewall and router platform that offers advanced features, robust security, and high customization. It’s widely used in both home and enterprise environments to protect networks and ensure smooth data flow. With pfSense, you can enjoy features such as VPN support, intrusion detection and prevention, content filtering, and more.
HP t740 Thin Client: A Budget-Friendly Option

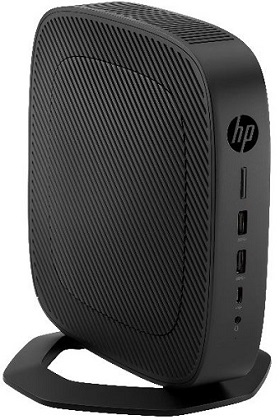
The HP t740 Thin Client is an often-overlooked piece of hardware that can be repurposed into a powerful pfSense router. It’s cost-effective and can be had for $400 or less, energy-efficient uses 50w or less, and small in size about 1L in volume, making it ideal for home and small office use. The HP t740 comes with various hardware options, including an AMD Ryzen processor and support for multiple network interfaces through it’s PCI expansion slot.
Building Your 10g Capable pfSense Router
Hardware Requirements
Before we begin, let’s ensure you have all the necessary hardware components for your 10g capable pfSense build with the HP t740:
- HP t740 Thin Client with an AMD Ryzen R1505G processor
- Network Interface Cards (NICs) with 10 Gigabit Ethernet support
- Adequate RAM
- At least 8g of ram but 16g is advisable if you’re going to do a lot of dns filtering or packet inspection
- Adequate Storage
- We recommend at least 256g of storage.
- It should be noted that the emmc card that comes with the t740 is not acceptable.
- USB Drive
for pfSense installation
- Anything 8g or larger will do.
Installing the Hardware
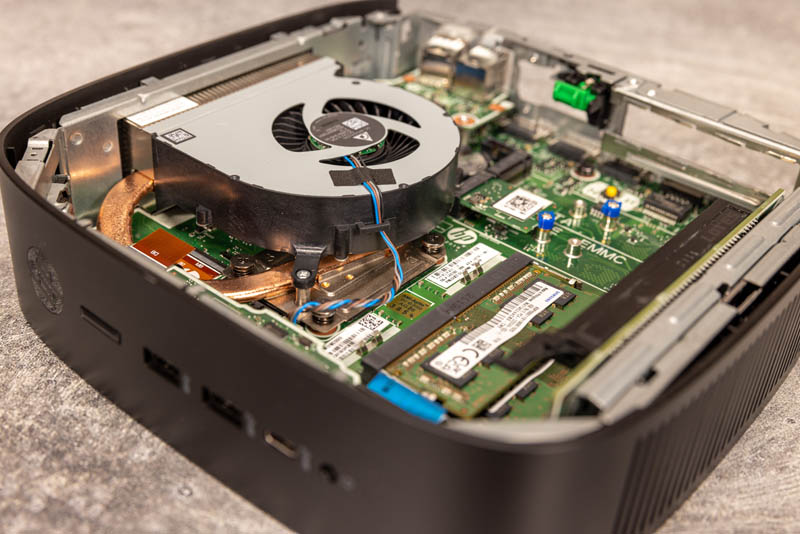
You’ll need to open the HP t740 up and install the new SSD, RAM, and Network Card
This video will help you get there.
Adding 10g NICs

To achieve 10 Gigabit Ethernet capabilities, you’ll need to add 10g NICs to your HP t740. Consult the pfSense hardware compatibility list to ensure compatibility. Install the NICs and configure them in pfSense.
Installing pfSense
Start by downloading the latest version of pfSense .
Create a bootable USB drive with the pfSense installer using tools like Rufus (Windows) or dd (Linux).
Insert the USB drive into the HP t740, and follow the instructions from our guide on installing pfSense on the HP t740 .
- It s a bit different than the standard install. Please read the guide.
Configuring pfSense
Once pfSense is installed, you’ll need to configure it to suit your network needs. Here are some essential configurations:
LAN and WAN Interfaces: Set up your LAN and WAN interfaces, and configure IP addresses and DHCP settings.
Firewall Rules: Create rules to allow or block traffic as per your requirements.
VPN Configuration: Set up VPN services like OpenVPN or IPsec for secure remote access.
Optimizing Your pfSense Router
Tuning Performance
To maximize your router’s performance, consider the following optimizations:
- Enable hardware offloading for supported NICs to reduce CPU usage.
- Adjust firewall rules and NAT settings for efficient packet processing.
- Regularly update pfSense to benefit from security fixes and performance enhancements.
Monitoring and Maintenance
Utilize the built-in monitoring tools and logs in pfSense to keep an eye on network activity and troubleshoot issues promptly. Regularly back up your pfSense configuration to avoid data loss.
Conclusion
Building a 10g capable pfSense router on a budget with the HP t740 is an excellent choice for those seeking both speed and security. With pfSense’s feature-rich capabilities and the HP t740’s affordability, you can create a reliable network solution without breaking the bank. Keep in mind that network security is crucial, and staying updated with the latest government regulations is essential for compliance.
If you’re looking to enhance your network’s capabilities while staying within budget constraints, consider this budget-friendly pfSense setup with the HP t740.
References
Disclosure and Affiliate Statement:
Affiliate Disclosure: We may earn a commission from links on this page. These commissions support our website and the content we provide. Rest assured, we only recommend products/services we believe in. Thank you for your trust! Click Here to Learn More
This article refers to other articles we've written:
- Running pfSense on the HP t740 Thin Client: Tips and Troubleshooting Guide
Learn how to set up pfSense on the HP t740 Thin Client, and how to troubleshoot potential issues like freezing and SSD detection problems.


