

Configuring Hotspot 2.0 on Alta Labs Access Points Easily

Table of Contents
How to Configure Hotspot 2.0 On Alta Labs APs
Hotspot 2.0 (HS 2.0) is a game-changer in wireless networking, offering seamless connectivity for users and streamlined management for network administrators. Configuring Hotspot 2.0 on Alta Labs APs ensures that your wireless network meets modern standards of efficiency, security, and user experience. This article guides you through the comprehensive steps required to set up Hotspot 2.0 on Alta Labs APs, ensuring an optimized and secure network.
Alta Labs AP6-PRO Professional Dual-Band Wireless WiFi 6 Access Point
Introduction
Why should you configure Hotspot 2.0 on your Alta Labs APs? Hotspot 2.0, also known as Passpoint, is designed to provide a seamless and secure Wi-Fi experience similar to that of cellular networks. By configuring it on your Alta Labs APs, you enable automatic, secure connections for your users, reducing the need for them to manually select networks or enter login credentials repeatedly.
Quick Goal: This guide will walk you through the setup process, covering TLS configuration, realm definitions, and key parameters for HS 2.0 compliance. By the end, you’ll have a fully functional Hotspot 2.0 network.
Understanding Hotspot 2.0
What is Hotspot 2.0?
Hotspot 2.0 is a Wi-Fi Alliance certification program that allows devices to automatically discover and connect to Wi-Fi networks that support HS 2.0. It provides enhanced security and seamless roaming capabilities across different Wi-Fi networks.
Benefits of Hotspot 2.0
- Seamless Connectivity: Users connect automatically to trusted networks without manual intervention.
- Enhanced Security: Utilizes WPA2/WPA3 Enterprise security, ensuring data protection and user authentication.
- Improved User Experience: Simplifies the connection process, reducing user frustration.
Prerequisites for Configuration of Hotspot 2.0 on Alta Labs Access Points
Before diving into the configuration, ensure you have the following:
- Alta Labs APs with the latest firmware. Recommended that you’re on at least firmware 2.0m or newer
- Access to Alta Labs Management Interface.
- TLS Certificates: PEM formatted
CA certificates,client certificates, andclient private keys. - Radius Server configured for EAP authentication.
Step-by-Step Configuration
WiFi Network Name Configuration
You can specify anything under the Alta Labs WiFi Network Name, however it is recommended you choose something trustworthy and simple or matching your businesses name.
WiFi Security Configuration
For this, you must chose Enterprise to support Hotspot 2.0 and Passpoint 2.0.

Radius Server
If you are using RADSEC, you wil need to use
127.0.0.1for the ip address here as we will be configuringradsecproxybelow.If you are using RADIUS, you should enter the
ip address of your radius server, thesecret, theauth port, and theaccounting port
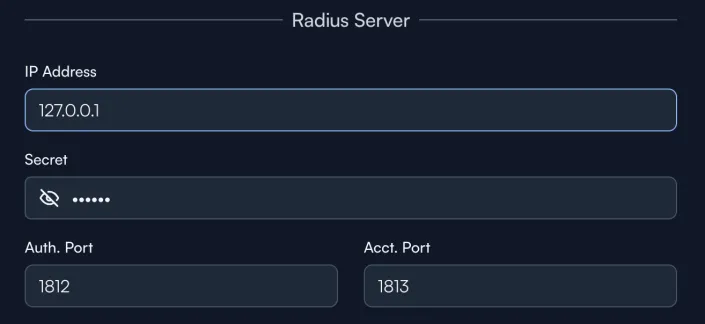
The default ports for authentication and accounting are
1812and1813respectively.
Sites Configuration
Site Configuration
Under sites, you should configure all sites that contain the access points that you’d like to apply the profile to.
Colors (Groups) Configuration
Under colors, you should either choose a color that applies to the access points within your selected sites that you want to apply the Hotspot 2.0 profile to.
Advanced Settings
Further configuration options will be available under
Advanced settings.
Default Network VLAN Configuration
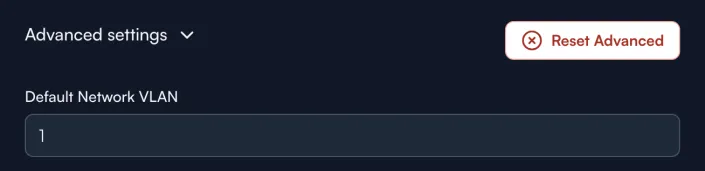
You can set the vlan to whatever you wish, but by default you should set it to 1.
Default Network Type (for Enterprise/Open) Configuration
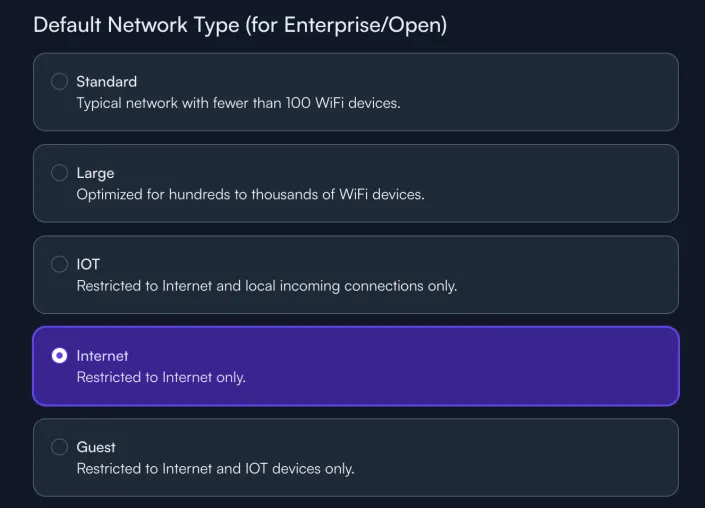
For Passpoint 2.0 and Hotspot 2.0 configurations, you should select the Internet (Restricted to Internet only) option and only this option..
Notes
You can specify whatever you’d like here.
Bands Configuration
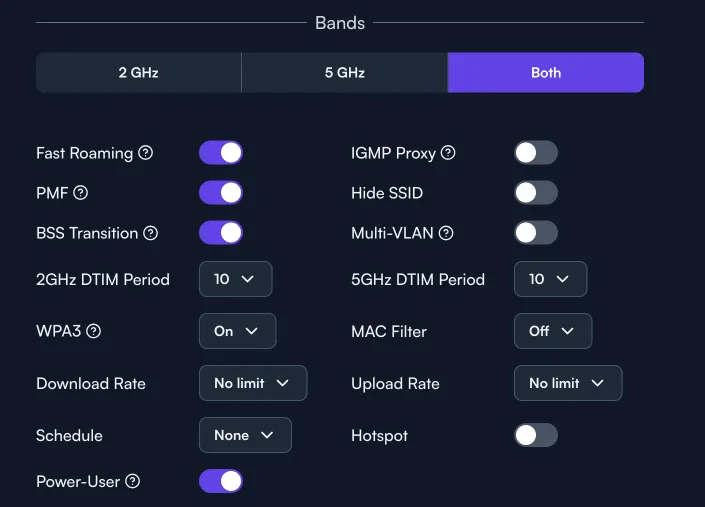
- Select the
Bothoption to have the SSID be available on both 2.4Ghz and 5Ghz - Enable
Fast RoamingRequired - Enable
PMFProtected Management Frames Required - Enable
BSS TransitionRequired - Set the
2GHz DTIM Periodand5GHz DTIM Periodto the maximum allowable,10 - Set
WPA3toOn - Enable
Power-User - Leave all other Bands options to their default.
Power User Settings
There are many configurable options under the alta labs power user settings. But for Passpoint 2.0 and Hotspot 2.0, we need to configure radsecproxy (depending on your environment) and hostapd to enable support.

The power user settings are configured in a
JSONformat. See examples below.
Configuring TLS Certificates
First, configure your TLS settings to ensure secure communication between clients and the network. You’ll need to take your pem encoded certificates and specify your CA Certificates, Certificate and Key.
If you are using
RADIUSand notRADSEC, you can skip this part.
If you’re using Google Orion, you can get the ca certificates here
{
    "tls": {
        "default": {
            "cacerts": {
                "cacert1": "
                -----BEGIN CERTIFICATE-----
                ...
                -----END CERTIFICATE-----
                ",
                "cacert2": "
                -----BEGIN CERTIFICATE-----
                ...
                -----END CERTIFICATE-----
                ",
                "cacert3": "
                -----BEGIN CERTIFICATE-----
                ...
                -----END CERTIFICATE-----
                "
            },
            "cert": "
                -----BEGIN CERTIFICATE-----
                ...
                -----END CERTIFICATE-----
                ",
            "key":"
                -----BEGIN CERTIFICATE-----
                ...
                -----END CERTIFICATE-----
                "
        }
    }
}
Configuring Realms
Define the realms to manage authentication across different servers.
The example here is the configuration for Google Orion .
{
    "realms": {
        "*": {
            "servers": ["216.239.32.91", "216.239.34.91"],
            "tls": "default"
        }
    }
}
Setting Up Hostapd Configuration
The hostapd configuration is crucial for defining how your AP will handle Hotspot 2.0. Customize the following to your liking.
The example here is the configuration for Google Orion .
{
    "hostapd": "
        hs20=1
        internet=1
        interworking=1
        access_network_type=2
        disable_dgaf=1
        oce=6
        ap_isolate=1
        venue_name=eng:Orion
        venue_url=https://orion.google.com
        hs20_oper_friendly_name=eng:Orion
        radius_request_cui=1
        radius_acct_interim_interval=300
        roaming_consortium=F4F5E8F5F4
        anqp_3gpp_cell_net=310,410;310,280;310,150;313,100
        nai_realm=0,*.orion.area120.com,13[5:6],21[2:4][5:7],23[5:1][5:2],50[5:1][5:2],18[5:1][5:2]
        domain_name=http://orionwifi.com
        #venue_group=1
        #venue_type=0
    "
}
We’ve made an example available of the full configuration in a github gist.
Key Parameters Explained:
hs20=1: Enables Hotspot 2.0.internet=1: Indicates internet access.interworking=1: Enables interworking for seamless roaming.disable_dgaf=1: Disables DGAF to prevent multicast traffic.oce=6: Optimizes connectivity experience. For Carrier Offload and Google Orion this is a must!ap_isolate=1: Ensures layer 2 isolation for security.
A little translation is required, but there are many more recommended configuration options that I’ve specified in my Hotspot 2.0 Configuration for OpenWRT Devices article . Compare them to the exact line items you need in the hostapd.conf example to understand how they need to be defined for alta labs devices.
Suggested Extra Hostapd Configurations
- Setting a minimum rssi for connection and probe requests
- Setting a QoS map
- Setting a backup RADIUS server (if not using our radsec configuration)
- For OpenRoaming, setting the Operator-Name attribute 126
- Setting the Multi-Band Operation configuration
- Configuring and optimizing WMM settings
- Additional security flags and configurations such as
wpa_disable_eapol_key_retries=1andwnm_sleep_mode_no_keys=1 - Setting maximum supported clients
- Disconnecting devices with low ack
To understand all of the hostapd configuration options may take a while. Many of the options may not be supported on Alta Labs devices, you’ll need to experiment a bit. Please read the following to understand more about the hostapd configuration options
Air-Time Efficiency
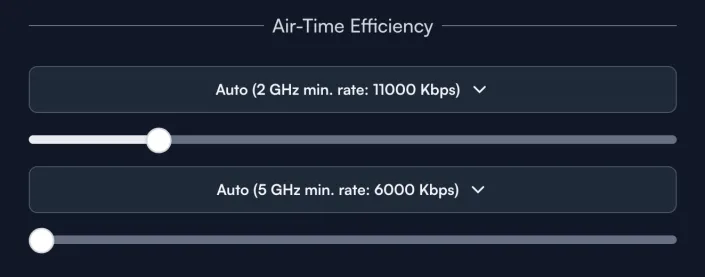
You can configure this however you’d like, but we recommend leaving it as the default configuration.
Testing and Validation
Testing Connectivity
- Connect a compatible device: Ensure the device supports Hotspot 2.0.
- Verify automatic connection: The device should connect automatically without manual selection or credentials.
- Check security settings: Ensure the connection uses
WPA2-EnterpriseorWPA3-Enterprise.
Troubleshooting
- Connectivity Issues: Check if the TLS certificates are correctly installed and valid.
- Authentication Failures: Verify realm configurations and radius server settings.
- Performance Issues: Optimize the
hostapdparameters and ensure the AP firmware is up to date.
Conclusion
Configuring Hotspot 2.0 on Alta Labs APs is a straightforward process that significantly enhances the user experience and network security. By following the steps outlined in this guide, you can set up a robust, seamless, and secure Wi-Fi network that meets modern connectivity standards.
Alta Labs AP6-PRO Professional Dual-Band Wireless WiFi 6 Access Point
For more detailed information and support, visit the Alta Labs documentation and Hotspot 2.0 specification .
References
- Wi-Fi Certified Passpoint
- Alta Labs Documentation
- OpenWRT Hotspot 2.0 Deployment Guide
- Hostapd.conf Example
- Alta Labs Hotspot 2.0 Configuration Example
Disclosure and Affiliate Statement:
Affiliate Disclosure: We may earn a commission from links on this page. These commissions support our website and the content we provide. Rest assured, we only recommend products/services we believe in. Thank you for your trust! Click Here to Learn More
Related Posts